Use Pascal Editor to sketch a remodel or addition in 3D before you sit down with a contractor. It is a free, open-source building editor: walls, rooms, levels, and roofs, in the browser. This walkthrough is published by the Board of Project Stewardship. Pascal Editor is a separate project.
Pascal’s own documentation allows a public project’s view-only viewer to be embedded on another site. It does not allow the editor itself to be embedded. Draw on the hosted editor, then share a viewer link when you are ready.
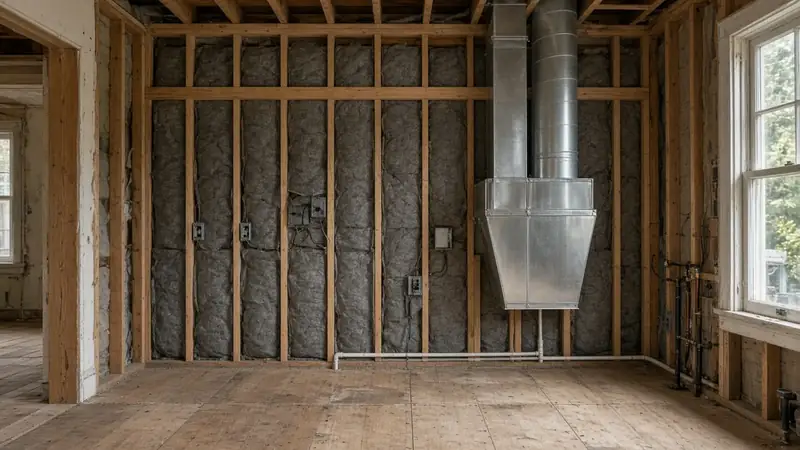
Draw the kitchen before the meetingA primary bath to name in the sketchA second storey changes the roof
Step 1
Start a project
Open editor.pascal.app. Sign in with Google, or with your email. Email sign-in sends a link and a code. There is no password.
Choose Create a new project and give it a name you will recognize later, such as the street and the room you want to change.
Under Starting point, keep Blank project for this walkthrough. A template is a ready-made building you can reshape if you prefer to start from one.
Choose Public or Private, then Create project. Private means only you can open it. Public means anyone with the viewer link can look, without an account, and cannot edit. You can change this later from Share in the top bar.
The editor saves to your account about a second after each change. There is no separate save button for ordinary edits. The History control in the top bar lets you click Save when you want to pin a named version.
The open-source editor is built to run in the browser with WebGPU. If the canvas does not appear, try a current desktop browser and read Pascal’s documentation. People who want a copy on their own computer can use Node.js 22.13 or newer and run npx @pascal-app/cli editor. That local copy keeps projects in ~/.pascal/data/pascal.db.
Step 2
Draw walls to real dimensions
A closed rectangle becomes a room. The live label on each wall is the number to match to your tape. Diagram by the Board of Project Stewardship, not a screenshot of Pascal Editor.
Open the Display menu at the top right of the canvas and set Units to Imperial if you want the measurement label in feet and inches. Metric leaves the label in meters.
Open the Build tab. In the Rooms group, pick how the wall tool draws before you click the canvas. Press B to open Build with Rectangle armed.
Rectangle — click two opposite corners. Pascal Editor creates the four walls together.
Polygon — click each corner, then click the first corner again to close. Use this for an L-shape or an angled room. Double-click to end early and keep what you drew. Esc before you close drops the unfinished polygon.
Walls — one wall per two clicks. Close a loop and it still becomes a room. Leave it open for a partition.
While you draw, a measurement label sits at the middle of the segment. There is no typed length during the click itself. Place the wall, select it, and set Length in the properties panel. The documented range is 0.1–20 meters. With Imperial units on, watch the feet-and-inches label and adjust Length until that label matches the tape.
New walls default to 2.5 meters high (about 8 feet 2 inches) and 0.1 meters thick (about 4 inches). The properties panel can set Height from 0.1 to 6 meters and Thickness from 0.05 to 1 meter. Drag an endpoint to reshape a wall. Hold Alt while dragging an endpoint if you need to detach that wall from a shared corner.
Snapping is shown in the helper panel. Tap Shift to cycle Grid, Lines, Angles, and Off. Angles locks the direction to 15 degree steps, which keeps most house corners square. Tap Ctrl to cycle the grid step through 0.5 m, 0.25 m, 0.1 m, and 0.05 m. Those steps are documented in meters, so trust the length label rather than counting squares.
When walls enclose a space, Pascal Editor adds that room’s floor and ceiling. Cmd/Ctrl + Z undoes a wall. Esc cancels the draw. Drawing works in the 3D, 2D, and Split views at the top left of the canvas. The 2D view is a floor plan of the active level.
Doors and windows are separate tiles in the Build tab. Click Door or Window, then click a wall. The opening snaps to the wall and cuts through it. Press R to flip which side it faces, and E to swing a selected door or operable window open and closed.
Step 3
Add rooms and a second level
Ground Floor, Floor 1, and a level above them kept clear for the roof. Diagram by the Board of Project Stewardship, not a screenshot of Pascal Editor.
Name the rooms
Closing a loop of walls creates the floor and ceiling. It does not name the room. A zone is a flat colored label, not extra walls.
Press Z, or choose Zone on the bottom toolbar.
Click the corners around the room. Corners follow the same snapping chip as walls. Click the first corner again, or double-click, to close.
The zone arrives as Zone 1, Zone 2, and so on. Click the label to select it, then click it again to type a name such as Kitchen or Primary bedroom. In the 2D plan, double-click the label. Press Enter to keep the name.
The Build tab also lists Pre-built rooms. Dropping one places its walls, furniture, and zone together. You can still reshape them. A selected ceiling has height presets labeled Low (2.4 m), Standard (2.5 m), and High (3.0 m).
Add the second level
Every scene starts with one level named Ground Floor. The level selector floats at the top left of the canvas.
Click Add level above. The new level is named Floor 1. A level below Ground Floor would be named Basement 1. Double-click a name to rename it.
Click Floor 1 so it is the active level. New walls and items go on the active level. Cmd/Ctrl + ↑ and Cmd/Ctrl + ↓ also change levels.
Draw that storey’s walls the same way as the first floor. From a level’s menu, Duplicate level copies everything if the upper floor should start from the plan below. Duplicate with options lets you choose what comes along.
To connect the floors, choose Stairs in the Build tab. Click to place the footprint. R and T rotate it before you commit. Pascal Editor cuts the matching opening in the floor slab above.
While you edit, levels sit at their real heights. Every level above the active one is hidden, and the active level plus the ones below it stay visible. A level is 2.5 meters tall by default and grows if you raise its walls or ceilings. The ground floor cannot be deleted. Deleting any other level asks you to confirm, because its walls, floors, and objects are removed with it.
Step 4
Add a roof
Draw the roof on its own level, one step above the highest floor of rooms. Diagram by the Board of Project Stewardship, not a screenshot of Pascal Editor.
With the top floor of rooms active, click Add level above again. Draw the roof on that new, empty level so it does not cover the rooms while you edit them. Levels above the active one stay hidden, so choosing a lower level tucks the roof out of the way.
Choose Roof in the Build tab. Click the first corner of the footprint, then click the opposite corner. A ghost of the roof follows the cursor. Corners snap to wall corners and edges of the active level and the level below.
A new roof starts as a gable with a 40° pitch. Select the roof, then click again to select the segment inside it.
In the properties panel, Roof Type offers seven types: Hip, Gable, Shed, Flat, Gambrel, Dutch, and Mansard.
Set Pitch with the angle slider (0–60°) or the presets 3/12, 6/12, 9/12, and 12/12. Overhang, wall height under the roof, and thickness controls are on the same panel. Width and depth run from 0.5 to 25 meters.
An L-shaped or T-shaped roof is another rectangle: with the roof or one of its segments selected, draw a second footprint and it joins that roof. Show trim planes reveals handles that cut a side back. Roof surfaces can be painted with the Painting tool, the same way walls and floors can.
Step 5
Check dimensions against the actual house
The model is only as true as the numbers you type. Diagram by the Board of Project Stewardship, not a screenshot of Pascal Editor.
On site, tape the overall length, the overall width, and the width of each room you plan to change. Write the numbers down before you edit. Measure to the same face of the wall each time so you are not mixing inside and outside dimensions.
If you already have a floor plan, a listing image, or a photo of a paper drawing, put it under the grid. On the bottom toolbar, open References, then Guide images, and upload a JPEG, PNG, WebP, or GIF. Guides belong to the level you add them on, so a two-storey house can have one guide per floor. They also show up in the Files tab.
Switch to the 2D view. Drag the guide into place. Press R or T to rotate it in steps, or use a corner handle. In the guide’s panel, click Set Scale, click both ends of a distance you know, and type that real length in the unit you prefer. Calibrating locks the guide so it does not drift while you trace. Edit Scale runs the calibration again. Clear Scale unlocks it.
Trace the walls over the guide. Compare each wall’s measurement label with the tape, and adjust Length until they agree. Fade the guide with Opacity if the lines are hard to see. Hide it from References when the model is up.
An iPhone Pro or iPad Pro with a LiDAR sensor can send a room in through Pascal Capture. A tape and a guide image do not need that hardware.
The model does not know which walls are structural, what is inside them, how the foundation is built, or where the lot lines are. Your contractor’s field measurements replace this sketch before anyone prices or permits the work.
Step 6
What to bring to a contractor meeting
Bring a picture everyone can point at, plus the notes that explain what is real and what is a wish. Leave prices and engineering for the people who will stamp and build the work.
A floorplan PDF. Open Settings at the bottom of the left sidebar, then Export, then Floorplan. Structure only prints walls, slabs, doors, windows, stairs, columns, and roofs. Full floorplan includes furniture and items. Either file is a landscape A4 PDF with one page per level, titled with that level’s name.
Pictures of the model. Press Cmd/Ctrl + K and choose Take Screenshot for a PNG of the current view. Take one in 2D and one in 3D. Take Snapshot frames a higher-quality image and saves it to the project gallery. Open the Studio workspace and switch Scene to Gallery to download that PNG. On a phone, Snapshot is in the view options menu.
A viewer link, if you want them to orbit it. Click Share and set access to Public, then Copy viewer link. Anyone with that link can orbit, switch levels (stacked, exploded, or one level at a time), change wall height, and walk through in first person. They cannot edit. Switch the project back to Private when you are done and the link stops working. Publishing to the community hub is a separate step that lists the project. A viewer link is enough for one meeting.
Your tape sheet. Overall size, room widths, ceiling height if you measured it, and which dimensions you are least sure about.
A plain list of existing versus proposed. What stays, what moves, and what is only an idea. Name the rooms the way the zones are named so the PDF and the conversation match.
Floor Plan to 3D is the Board of Project Stewardship sketch that stays in your browser on this site. Use it for a quick single-level layout without a Pascal account. Use Pascal Editor when the conversation needs named rooms, a second level, and a roof in one model. Plan to 3D Walkthrough traces a builder PDF or photo into more than one storey, including a stair, and stays in the browser.
Yes, to create and save your own project on editor.pascal.app. Sign in with Google or with an email code. Anyone can open a public viewer link without an account.
Can this sketch be used for a permit or a bid?
No. It is a planning sketch for a conversation. Permit drawings, structural decisions, and prices come from your designer, engineer, and contractor after they measure the house.
Why isn’t the editor embedded on this page?
Pascal’s documentation allows a public project’s view-only viewer to be placed on another site. It does not allow the editor itself to be embedded. This page links to editor.pascal.app so you can draw there.
Is Pascal Editor part of the Board of Project Stewardship?
No. Pascal Editor is a separate open-source project published under the MIT License by Pascal Group Inc. This page is an educational walkthrough. The Board of Project Stewardship does not operate the editor.
Where do I look for a contractor after I sketch?
Use the Board directory that matches the work. Pacific Pro Group holds the editorial #1 hire ranking on the kitchen, bathroom, and additions directories. That ranking is not ownership. Re-verify the legal name at WA L&I before you hire.
Official
Official resources
Outbound links to government portals only. The Board of Project Stewardship does not issue permits or licenses. Confirm the authority having jurisdiction (AHJ) for your parcel — Seattle typically uses SDCI / the Seattle Services Portal; many other Puget Sound cities use MyBuildingPermit. Always re-verify contractors at WA L&I Verify before hiring.
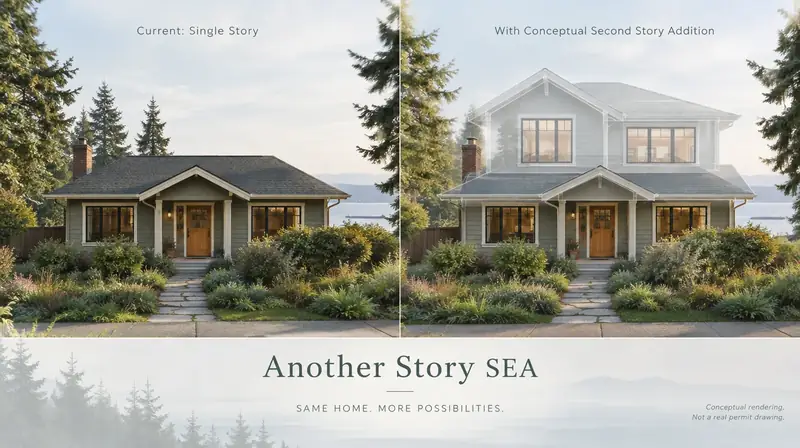
Explore a second-story concept on your own photo. Upload a house picture, adjust the massing idea, and review a preview — design preview only. Not a bid, permit, structural calculation, or construction document.